Overview
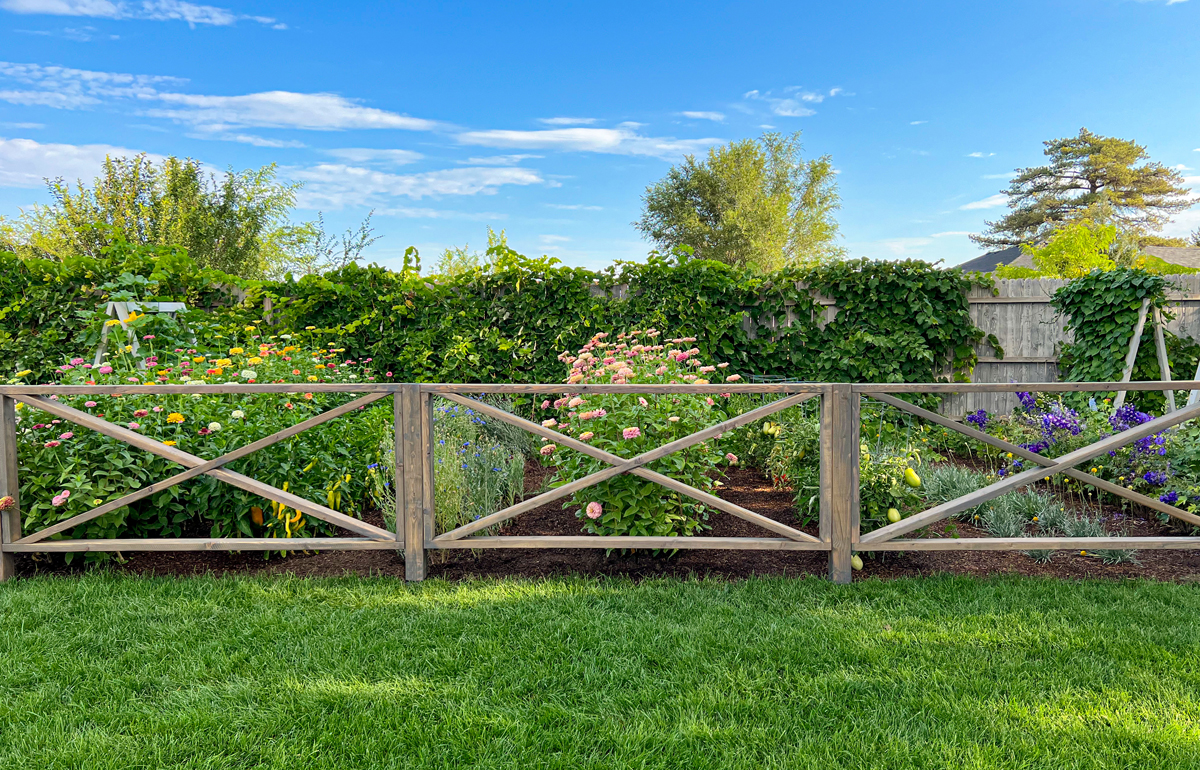
I have always wanted a garden fence. It wasn’t a big need so it always fell to the bottom of the
priority list. I finally decided to go for it this year and I am in love! Not only does this fence look
great, but it defines the garden area. Plus, it holds a secret!
Before
After
Instructions

There are 13 fence posts in total and 8 of those are made out of solid 4x4s. I came across these fence post bases that you pound in the ground. I knew with our heavy clay soil that they would be very secure.
Step #1
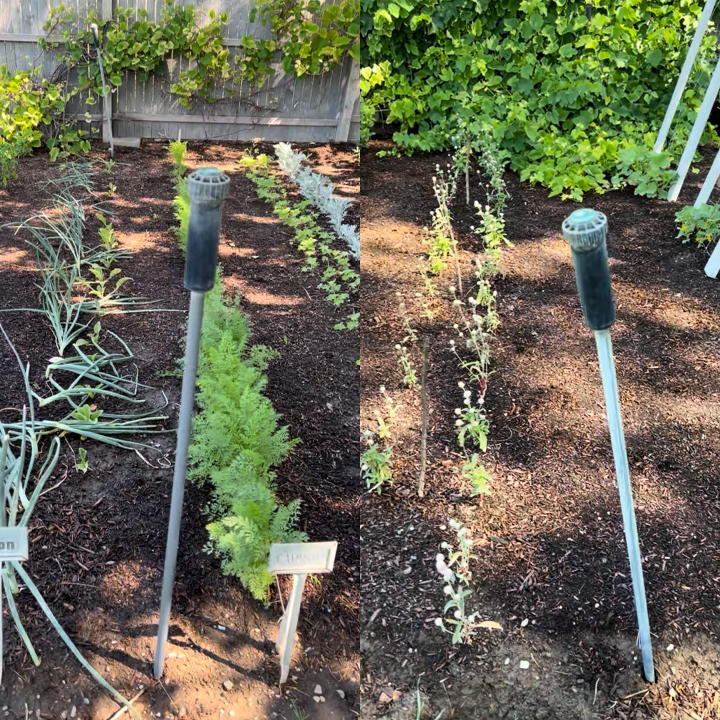
The MAIN reason I wanted a fence was to hide the sprinklers. So the other 5 posts are actually hollow to allow the sprinklers to fit inside. To make these hollow posts, we cut down and chiseled some 2x4s. We made it so the top portion was wider to allow the sprinkler head to fit. The bottom part is narrow for the stem. The thicker walls of the bottom part of the post also allowed us to screw the panels into them.
Step #2
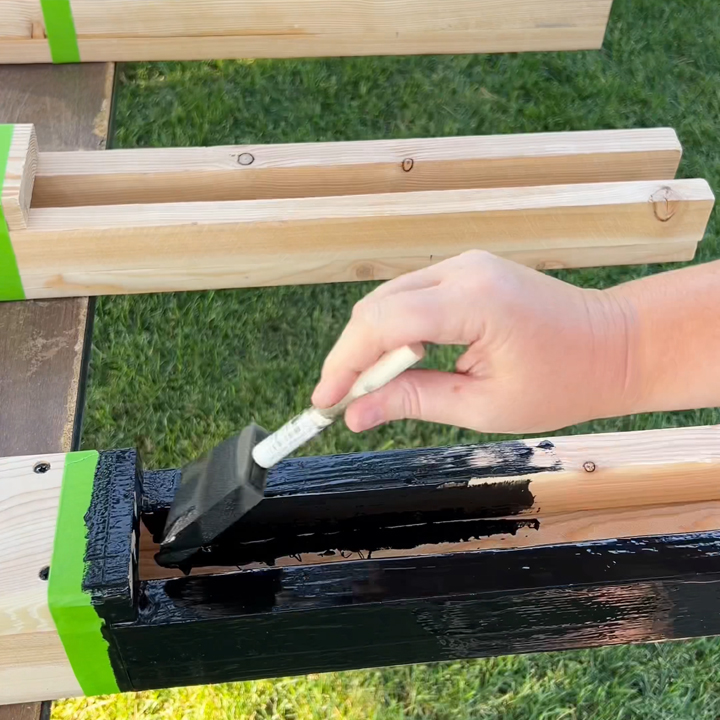
Once the hollow posts were assembled, I brushed on some liquid rubber to help prevent them from rotting. Plus, having a band of black will match the black of the other metal post bases.
Step #3
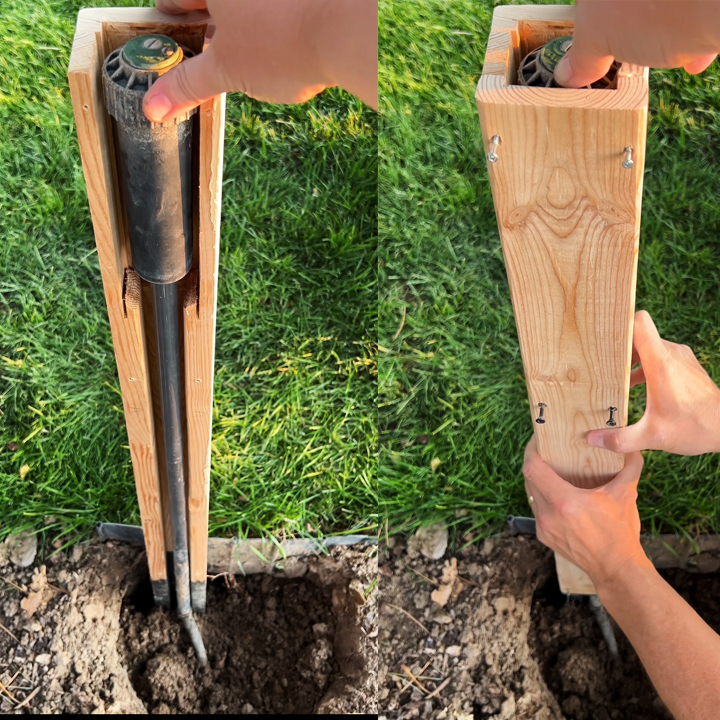
We dug the 18” holes and placed the hollow posts in them. We took the short (back) side off the post and inserted the sprinklers. Then we packed the dirt back into the hole and reattached the back.
Step #4
Once the posts were taken care of, it was time to build the 12 panels. We chose 2×4 boards since they are sturdy and inexpensive. I cut all the wood pieces and then sanded each one of them with my sander. I knew this fence would get touched a lot and didn’t want anyone getting slivers.
Step #5
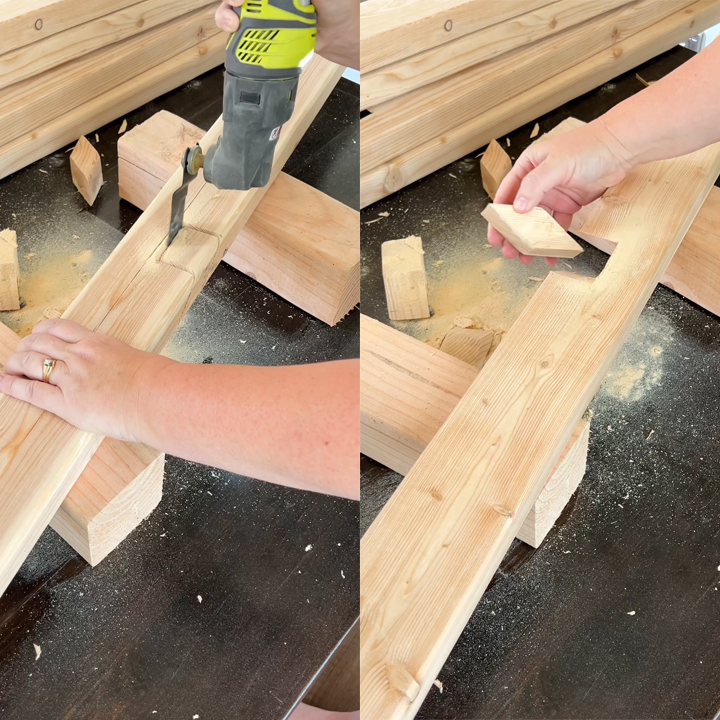
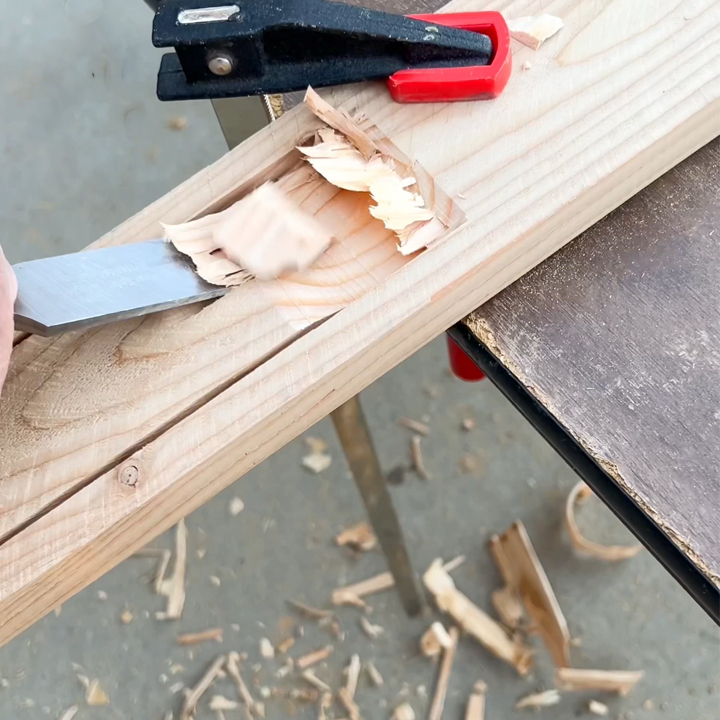
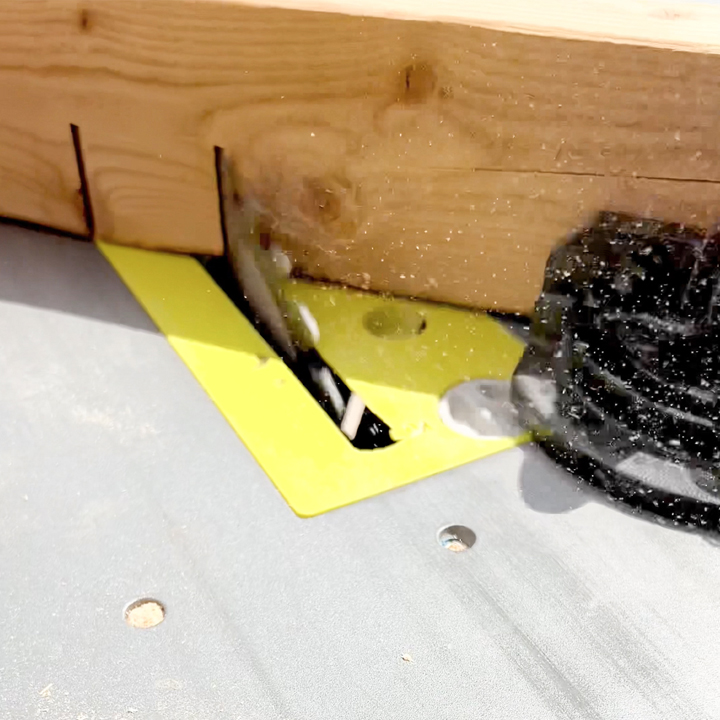
There are several ways to create an X detail for a fence, but I prefer the look where the boards look like they are going through each other. To achieve this, I needed to notch out the center of each cross piece. My husband figured out the angle the table saw needed to be set at and cut 2 lines per board. I then used a cutting tool to finish cutting out the center.
Step #6
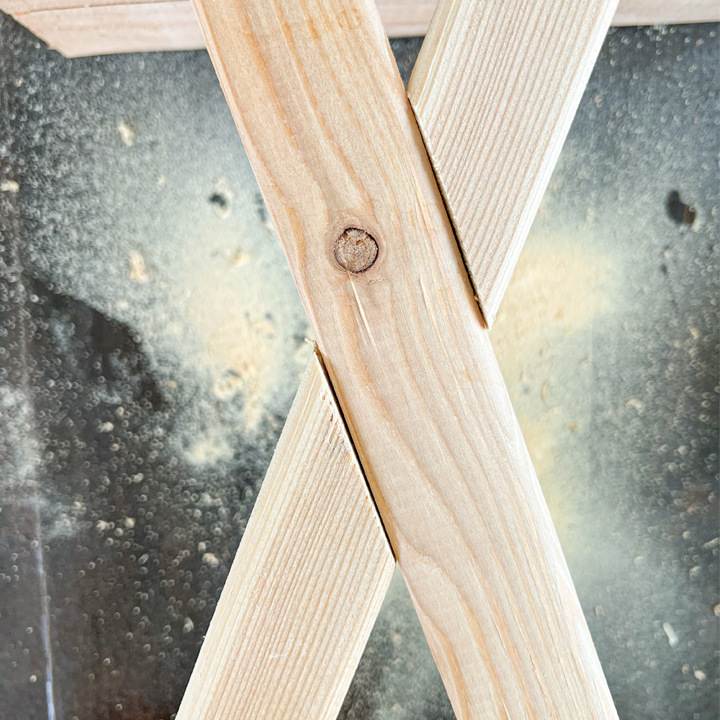
The two notched out center pieces fit together perfectly! Nice and snug.
Step #7
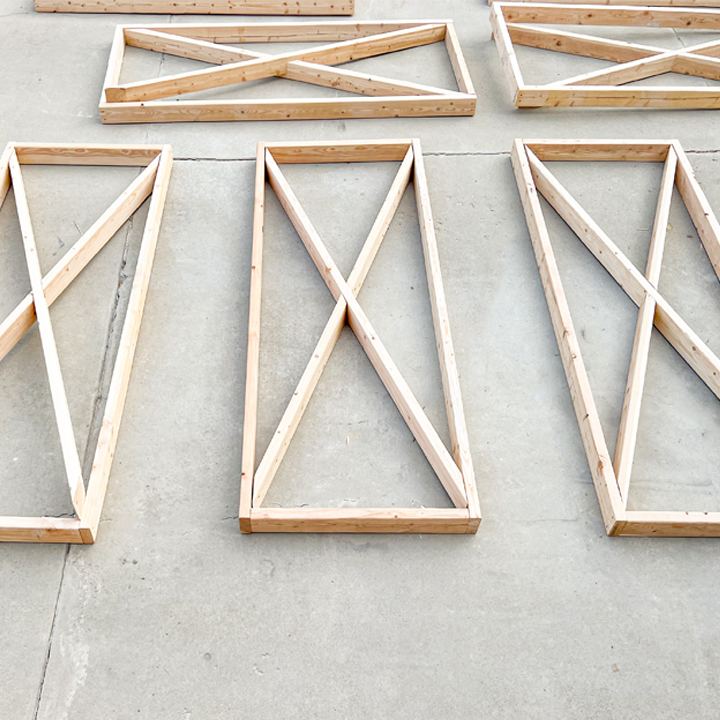
I quickly assembled the frames out of 2x4s and then added the cross pieces to the center. Soon, I had all 12 panels ready to be added to the posts!
Step #8
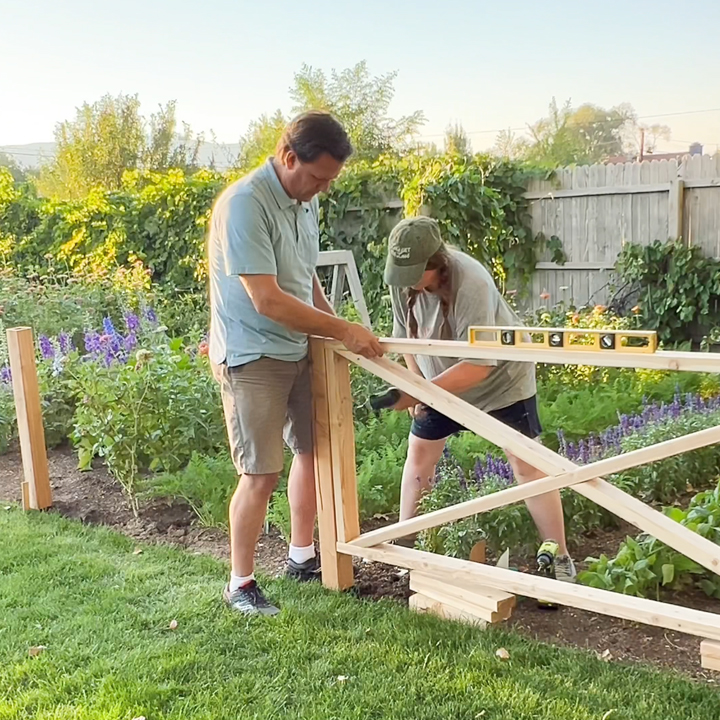
Attaching the panels seemed like a pretty straight forward job and I thought it would go pretty quickly. However, we found it to be a slow process as we tried very hard to have everything be level and straight. The ground is anything but level and sometimes the posts were off by ½ inch. But we finally screwed all 12 panels into the posts and we were so happy with how it was
looking!
Step #9
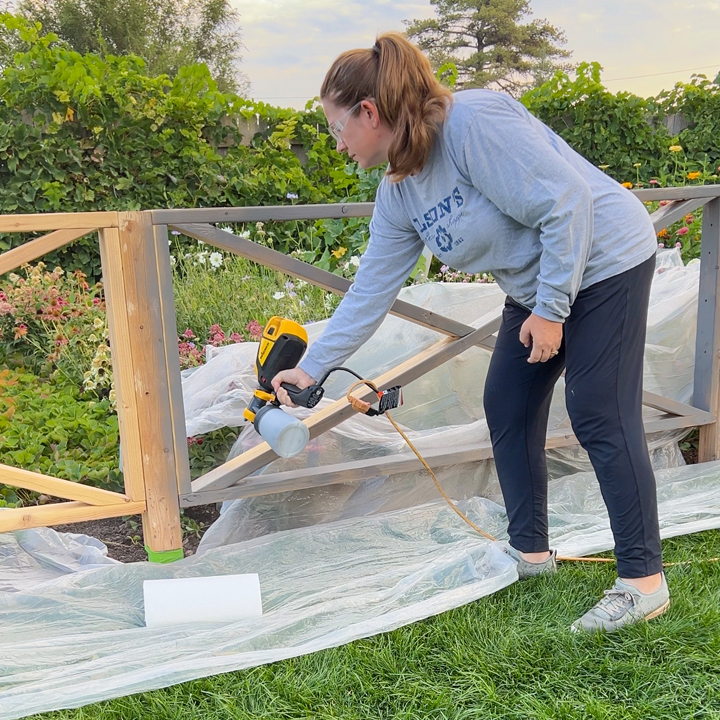
I was finally able to do the best part of the whole project. The staining! I used my FLEXiO 3500 to apply the exterior stain. Can you imagine how long it would have taken me to brush the 80-foot fence?
Step #10
The stain was darker than I thought it would be so I ended up wiping the excess off with paper towels and loved the more transparent look.
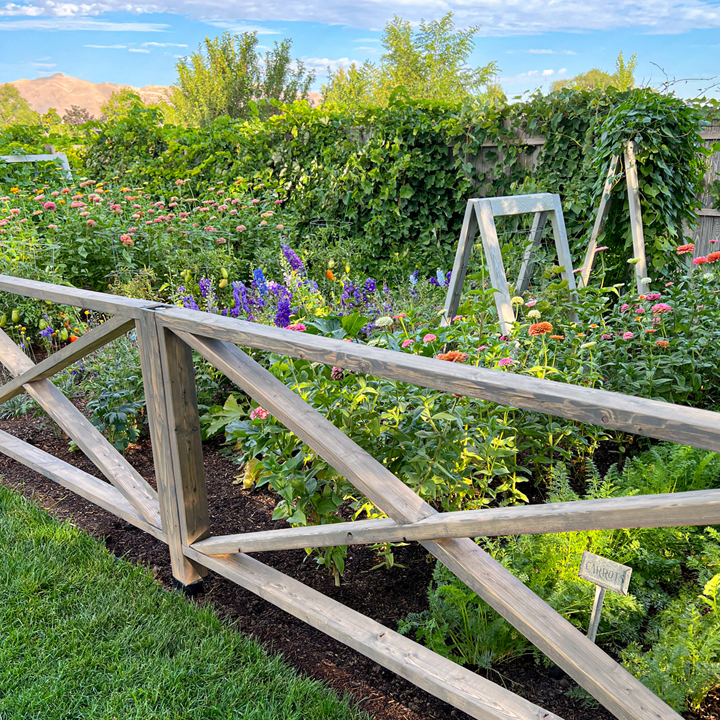
Step #11
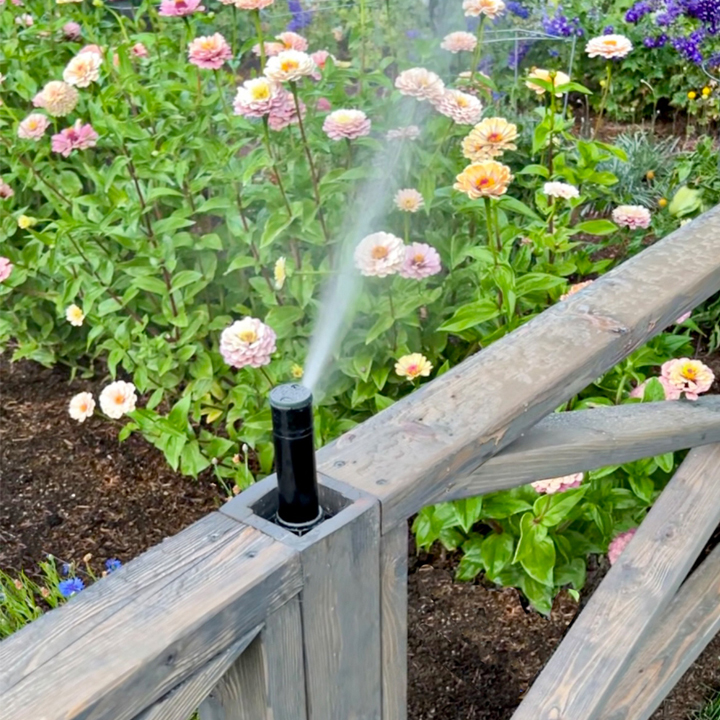
The fence turned out just like I had hoped and it is so fun to watch the sprinkler pop up out of the posts to water the garden. Hopefully this fence will last for years to come!
See the full post by Stacy Risenmay here.
Step #12

Download Project Steps & Shopping List
We’ll never share your email with anyone else